5 Little-Known (ahem, weird) Skincare Tools That I Am OBSESSED With

5 weird facial tools that can transform your skin. How to microneedle. How to gua sha. (PHOTO CREDIT: taken by Wolfskull Creative for Atelier + Stone Jewelry!)
Okay, so here’s the scoop. I’ll try anything. I loooove experiencing new things, and that goes for my skincare. I am constantly trying new products or searching for “hacks” and new ideas…basically anything that feels like a mini science experiment. :) That said, I have tried a lottttttt…and somehow my top 5 favorite hacks are also kind of my weirdest (????) and today, I’m spilling the beans—from gua sha to microneedling to yellow nephrite and a…facial VACUUM? Things are about to get weird. And your skin is gonna thank ya.
Let’s do this.
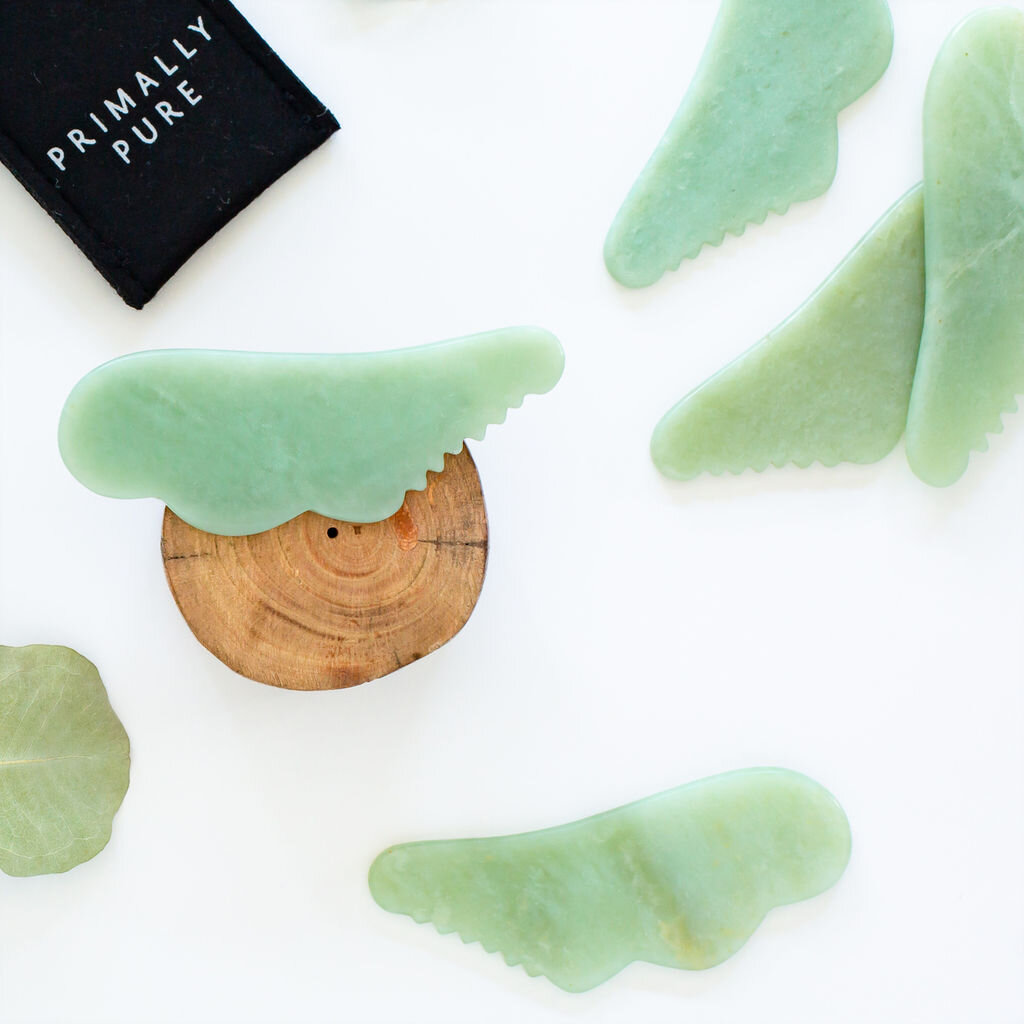
#1 gua sha
If you’re like, “gua WHAAAAAA??” just hear me out. I had NO clue wha gua sha was even a few months ago. Like, zero. But holy moly, in a matter of months, this little beauty stone has become my skincare MVP. Okay, Kate—well, what is it?!? This simple tool has been around for centuries and helps to promote circulation, reduce inflammation (ummmm…just wait until you see the pics below), promote lymph flow, clear congestion…and has been dubbed as “nature’s botox” #byewrinkles. Sound too good to be true? I thought so too. So I did a classic before and after photo, and let’s just say the results speak for themselves:

gua sha before….
the classic “just woke up.” my face is swollen, my eye bags are XXL special, ya know!

gua sha after….
seriously. i look like 5 lbs. lighter…just in my face alone, ha!
Yup. A #nofilter before + after photo (less than 15 minutes apart!) doesn’t lie. It’s that good. For this photo I took about 3 minutes using the gua sha technique, sipped my coffee and journaled for about 10 minutes, annnnnd looked in the mirror and was shocked to see the “after.”
HOW I USE THE GUA SHA:
I apply a Primally Pure facial mist and serum,
then use the gua sha tool to glide alone the skin and “dig” into crevices on the face (cheek bones, jawline, etc.)
downward strokes with the stone “drain” the skin and upward strokes “perk up” and plump tired skin.
I recommend doing this youtube tutorial when you first start to learn the technique! this is what I used to learn :)
WHERE DID I GET MY GUA SHA? (this is important!)
I got my gua sha from Primally Pure (duh) because i LOVE the unique shape of their stone. i tried one other gua sha stone that did not have as many edges/curves and it definitely was more limiting in it’s use. the way that primally pure shaped the stone allows you to “dig in” and along your jawline, cheek bones, neck, etc much more easily. not to mention, they sustainably sourced their serpentine jade (so rare!) and I love the instructions that came with it on youtube :) You better grab it now because they sell out fast, homies. (If they’re sold out get your name on that wait list!)
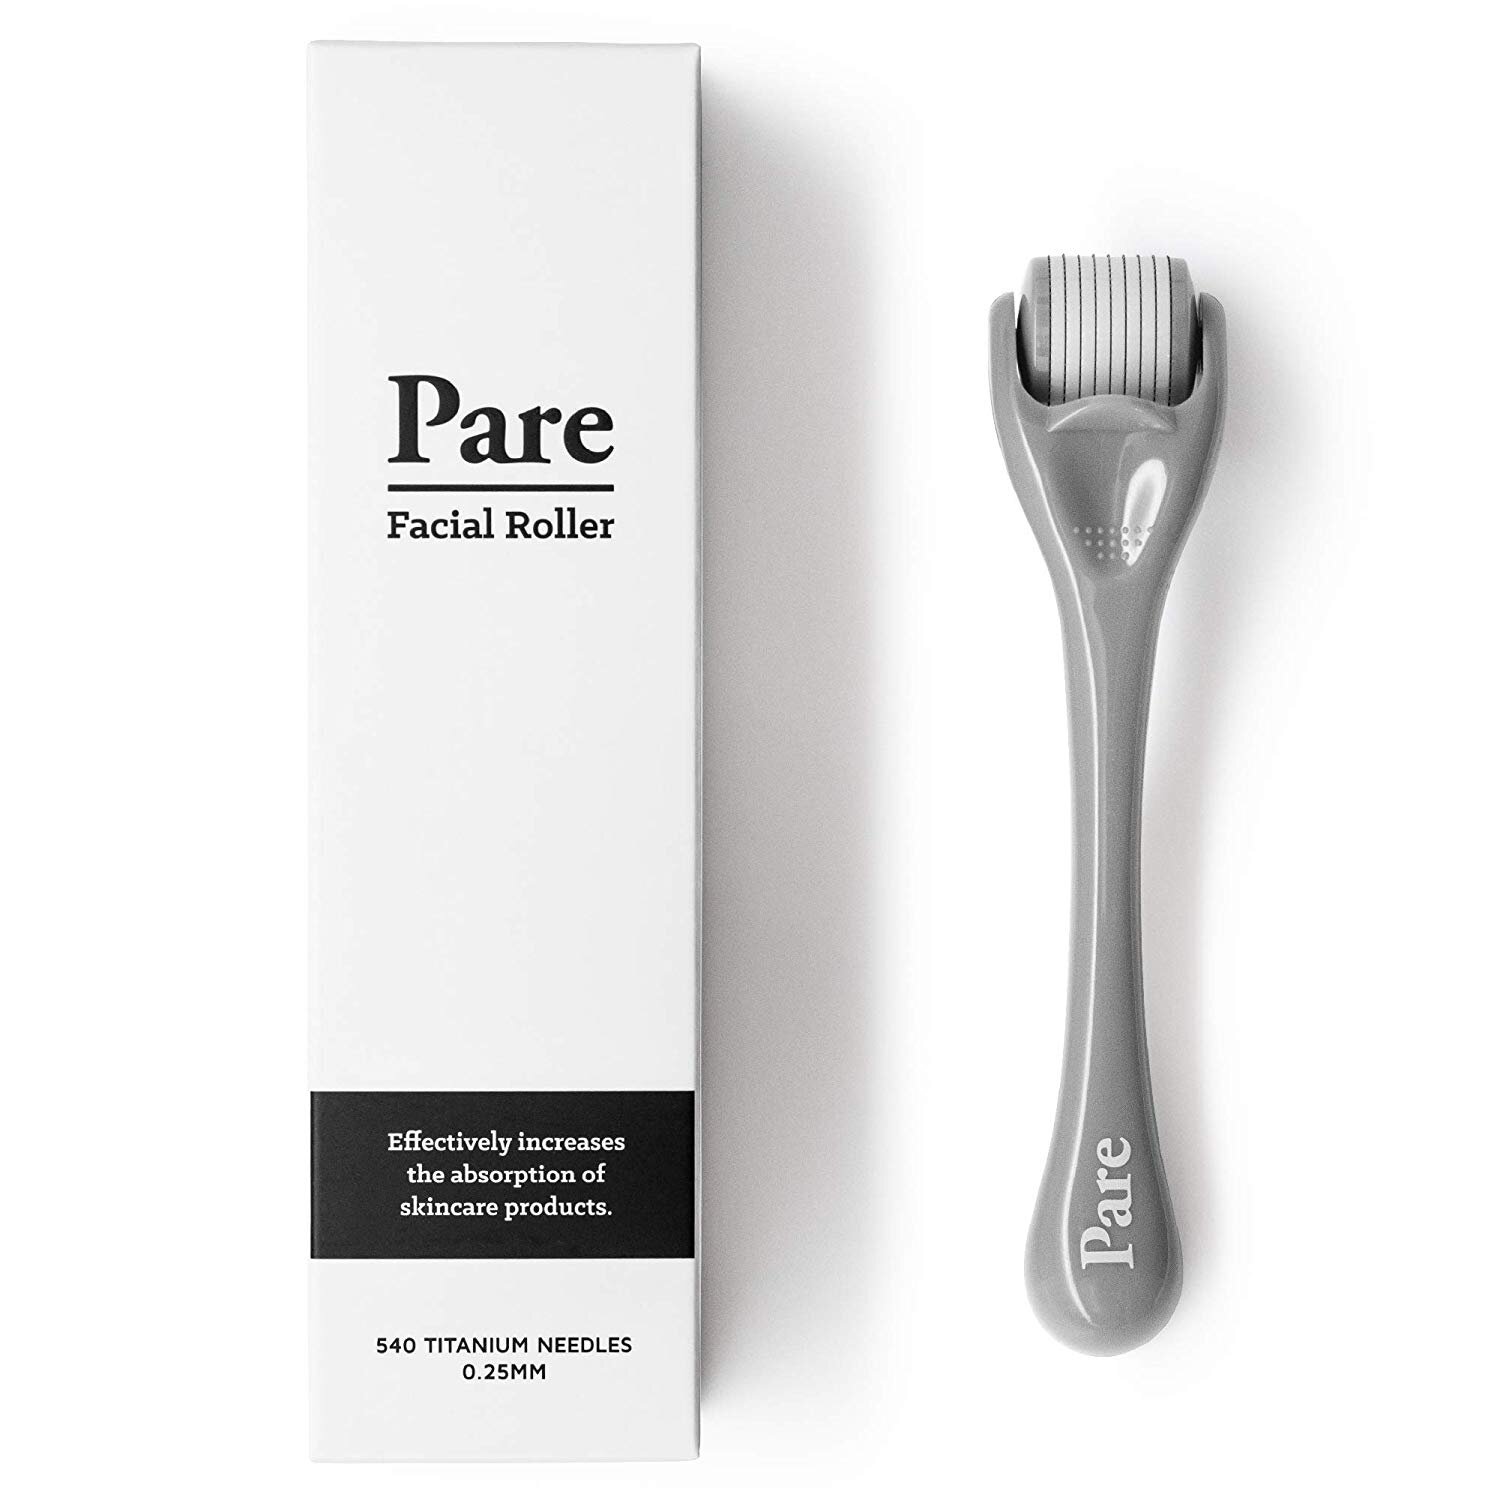
#2 facial rollers
Okay, honesty hour: I feel kind of feel I’m having an affair because I used to use my facial roller every single day because it is sooooo good and de-swelling + de-puffing + relaxing. (Insert the steamy mistress: gua sha.) While I now divide my “de-swelling” practice between my gua sha and facial roller, I am still obsessed with my facial roller collection. Nowwww Kate didn’t you just recommend gua sha for facial de-swelling? Here’s the scoop: facial rollers are also helllllla effective at de-puffing my morning face, promoting blood flow, and spreading out my facial oils—they just do it in a “less specific” and much more time-efficient way than gua sha.
In my opinion, gua sha is a bit more targeted—you can really pick and dig in where you are most swollen and use all of the corners with a bit more finesse. Buuuuut all things come with a trade off—gua sha works great, but takes a little longer than facial rollers. My review: both work great, it’s just about your needs in that moment. Gua sha: super effective, and a bit more time-intensive. Facial roller: still very effective (just less drastic), and suuuuuper time efficient. I use both tools multiple times per week, and I don’t know if I could pick a favorite if I tried!
Realistically, most mornings I still opt for my facial roller to promote blood flow and reduce that “I just woke up” swollen face hahah. Ya girl Kate is somehow alllllways running just a wee bit late in the morning and in need of a quick, time efficient (and effective!) fix…and that’s what the facial roller gives me. :) Again, I use a Primally Pure facial mist and serum and then use the facial roller to spread it out and decrease inflammation. Sooooo calming.
Wanna take it a step further? Find the roller that is best for you here. (Pssssst: there are more than just “jade” facial rollers *gasp!* and there may be a better stone for your skin. I personally use yellow nephrite!)

you’ve never facial rolled like this before….
with specific stones that are targeted to your skin concerns, primally pure is up-leveling the facial roller game!
#3 microneedle:
If you’ve been following along for awhile, you’ve heard me rant about microneedling and how much I love it. Okay soooooo did you say, needle, Kate?!!?! Yes, I did. Microneedling is a tool that takes super fine needles to puncture the outer layer of the skin, the epidermis. This minor injury to the skin releases growth factors and increases collagen production (AKA two things very, very valuable in keeping skin plump and wrinkle-free). It helps skin products, serums, and creams penetrate deeper into the skin and work from the inside out. This is what makes microneedling such an effective method of minimizing acne scars and signs of aging like fine lines and wrinkles.
Now to get real, professional microneedling, you need an appointment with a doc at the dermatologist, but Rodan + Fields popularized a way to use a microneedle at home in a much more casual way. While I don’t use any R+F products because they are don’t fit my “nontoxic” standards, I was very intrigued by the hype (and science!) behind microneedling. So I bought one on Amazon to use at home and I absolutely love it. This is one of my “day off” skincare routines as my face will be a bit red for a few hours afterwards. But the results it’s had on helping heal scars, fine lines, wrinkles are so, so worth it.
how to use a microneedle tool
Step 1: Apply whatever magic serum you want that day. Remember: the microneedle tool will help whatever you are putting on your skin get down deeper, faster. Usually I’ll pick one of the following options based on what my skin needs that day:
Fancy face serum: the ol’ standby! An oldie but a goodie!
Clarifying serum: zits be gone!
Soothing serum: hormonal acne savior.
Phyto-retinol: great for fighting wrinkles!
(Pssssst: If you are not sure which serum is best for you, read my serum 101 guide here!)
Step 2: Apply the oil of your choice to your face and then start microneedling.
Start by going up and down on your face with the microneedle tool. It will feel weird, but it definitely shouldn’t hurt! If it does, reduce the pressure you are using!
Then go horizontal or “side to side” with the same tactic
Then, heck, go diagonal!
What you are doing is mini puncturing the skin and signaling the skin’s healing through extra collagen production. (Collagen is the magical thing that keeps your skin plump, repairs wrinkles, keeps your eyelashes long, helps your fingernails grow, etc.)
And that’s it! Voila! You just microneedled! I would start by only doing this a few times per week as your skin adjusts. Personally, I have LOVED it and have focused it preventively on areas where my family is known to wrinkle (curse of the eyebrow furrow, I’m looking at you). This extra collagen and healing attention from the skin leads to radiant, plump skin that I think my 66-year-old self will thank me for. :)

microneedling:
boosts collagen, fights wrinkles, and reduces scarring
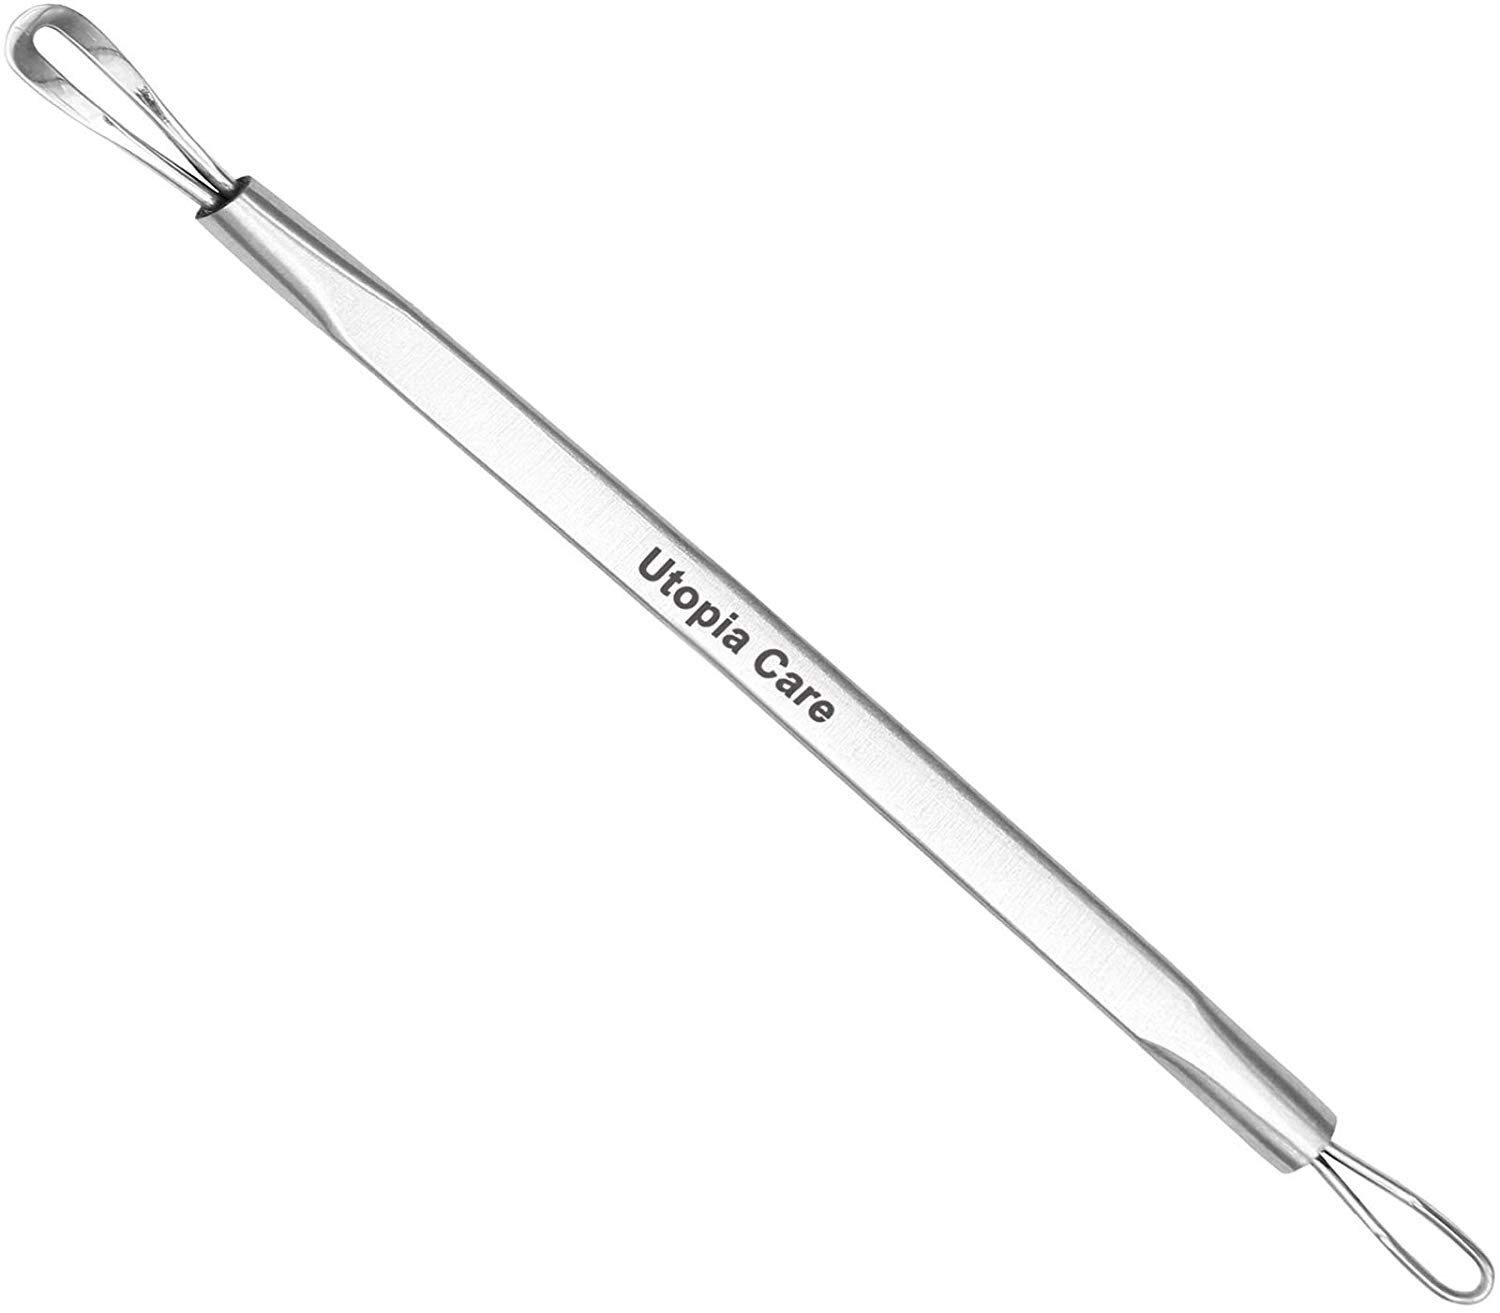
#4 zit popper
Okay, GUILTY as charged! I am one of those freaks who LOVES popping zits (Dr. Pimple Popper anyone????). But I also know that it is not good for your skin and can lead to even more breakouts. *womp womp* Buuuut…if I am gonna pop my zits anyway, I may as well do it right, yes? I found a zit popper tool at TJ Maxx a few years ago and it is amazingggggg. (I found one nearly identical on Amazon here for less than $5!) This little tool allows you to zone in on your zit—no more pinching it between your fingers, scratching yourself, leaving a mark, bruising, or discoloration madness—it just finds the zit, circles it, and pops it with ease. THE BEST.

zit popper
because we alllll know that we’re not supposed to pop our zits, but we do it anyway
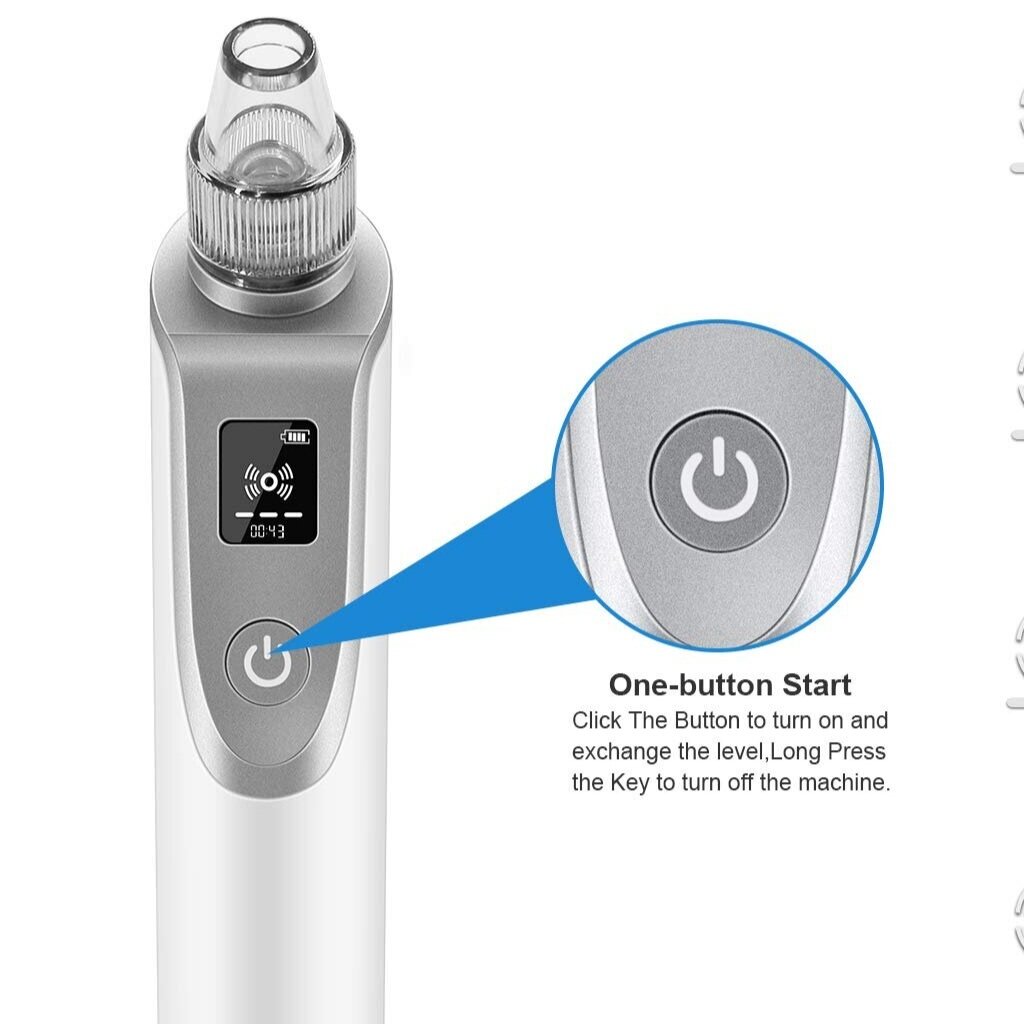
#5 face sucker / skin vacuum
Hahaha, okay—stay with me. OMG I am obsessed with this thing. I don’t even know what to call it? A skin vacuum? A blackhead eraser 5000? It is like a suction machine that your drag around your face and it quite literally pulls the gunk out of your face. If you’re like me, you take good care of your skin…but no matter what you do, you have a few blackheads on your nose that you can’t do anything about. Welp. This thing literally just sucks all the blackheads out. In like 2 minutes. It’s insane. If you have white heads or blackheads—you need this thing. Trust me! HEADS UP: I would start on the lowest suction setting when you are first starting. :) I have not had any swelling or over-the-top redness, but apparently it can happen with sensitive skinned gals! Just a note to use this for YOUR skin—start with low suction on a small area before you dive all the way in!

trust me on this one—
a facial suction device that quite literally sucks out allllll of your blackheads. amazing.
that’s a wrap!
5 weird skincare tools that you can use from the comfort of your own bathroom! Buh-bye expensive spa treatments. :) Something to consider: these tools are AMAZING, but shouldn’t be used alone—they are here to supplement your skin routine! Mini rant, buuut I firmly believe that good skin starts with beautiful, nourishing food, drinking lots of water, and investing in quality skin products. (Cough cough—if you haven’t tried Primally Pure yet…)
It’s probably a “duh” at this point because I’m always rambling about starting FIRST with your foundation before you get into the nitty gritty—focusing on the basics can transform your health (and skin!). I just want to be a voice of reason in the blogging world that you don’t need 90480835043 steps in your beauty routine—start first with taking care of your health and watch your skin transform!
Buuuuut if you’re like me, and have your basics covered (nutrition, hydration, sleep) these tools are AMAZING supplements and are the cherry on top for glowing skin. :) 5 tools that are simple, straightforward, and affordable—enjoy!
your skincare toolkit:
grab one or two or alllll 5 to jumpstart your skincare routine

but wait… there’s more! ;)
did you enjoy this post? then check out these: